Saturday, January 31, 2015

Super Bowl Fraction Football

Fraction Football was a success! We're ready for Super Bowl!


The students had a fantastic time playing with a partner and trying to score a touchdown by making equivalent fractions.


Each student was paired up and provided with a game board. Then, they drew cards and used mental math to find equivalent fractions. Each time they found an equivalent to the fraction on their ten-yard increment, they moved closer to the end zone.

They found the penalty cards to be a tremendous threat to their forward progress. So, each team had the option of pulling the penalty cards out of the fraction football deck. The teams seemed to move right along after the obstacle was removed.


I was making note of many learning skills taking place throughout the game. 

First, the partners were helping one another with the multiplication and division operations needed to complete the task of making an equivalent fraction. 
They were discussing the process and having "math talks". It was really cool!

Next, they were anticipating mathematical events. One of the students actually came up with the idea that it would be beneficial to remove the penalty cards. He said, he takes "two steps forward, and one step back". And he was afraid getting a touchdown would take all day. Well, it probably wouldn't have taken all day, but time at school is very limited. So his request was granted and provided for all students. 

Last, kids were having fun while learning math! Yay! mission accomplished. Movement and peer interaction is always a good thing...with given parameters. 

Follow the link below to preview the game.  It's a generic football game, so it doesn't matter which teams are playing. 


Cheers!


Tuesday, January 27, 2015

Math Fun

I've been having such fun creating math games for my class to play in the midst of boring NYS Module work.
The Modules do include some good instructional strategies, but the worksheets look like they were torn out of a college-level text book. No graphics, small type, no room for small people to write...and the list of issues goes on.

So, what's a fifth-teacher to do to liven up a math lesson? Make games! 


The "learning activities" (as I call them so as not to raise suspicion that we are actually having fun while learning) support module instruction while providing much needed movement and peer interaction.

One instructional component is drawing pictures to illustrate equations.  Tape diagrams, more specifically, are a key component of the math program.
To better help students learn how to place information in a tape diagram, I created a math power group lesson.  

In a math power group, kids are assembled into groups of 4-5 to work as a team. Each child has a job, as in a reading literature circle, and the jobs rotate for each new word problem.

One power group job is to manipulate the tape diagram cards that are cut out and placed in an envelope ahead of time. The blank tape diagram is used as the "game board" for the student to place the cards in a specific placement according to the word problem.


The students are picking up great habits, such as:
  • working cooperatively
  • reading thoroughly
  • reasoning through discussion
  • team accountability
  • time management 
  • and many more...


Look for many free downloads at my TpT store.

Next to come...Super Bowl Fraction Football! 

Cheers!

Sunday, January 4, 2015

Holiday Break Organizing

It's that time of year...January organizing! Time to refresh and begin again!

I had some ideas to get my classroom into shape after a long month of December. It seemed like I was just throwing things anywhere. Not anymore...everything has a home so that I can stay organized for the rest of the year!

I had a list of tasks to accomplish...always a good starting point!

1) Organize task cards and create a container to house them.
2) Organize a space for "extras". The extra materials will be for absent students and for students who lose items! (dislike)
3) Organize a binder to hold teacher-created materials.

 I LOVE TASK CARDS!
I found this crate on sale at AC Moore.  It was originally $22, but with 50% off and a coupon, I snagged it for $6. Then, a couple of packs of natural, large envelopes and I was ready to get started. I already had some labels to put through the printer. I just gathered all of the task cards around my classroom and organized them into categories. 

The task card crate, along with some larger crates, make perfect storage for my custom, classroom shelf. 

EXTRA PAPERS ARE A MUST!
These magazine file boxes were purchased at Staples a few months back and I knew I would find a purpose for them. The dividers are actually Martha Stewart stand up files which are specifically designed for magazine boxes. I had to cut each file apart to use as dividers since the file folders were only intended to hold a few sheets of paper. Then, labels for each day of the week were added. I can easily grab a sheet from the day of the week that a student was absent. Or, I have easy access to an extra when needed...it seems extras are ALWAYS needed!

BINDERS ARE A BLESSING!
The white binders are for the district curriculum. But, like many teachers, I create a lot of my own materials. I also get awesome supplemental lessons, worksheets, games, etc. from Teachers Pay Teachers and other sources.  

These cute, dotted, one-inch binders are fun and functional. 
*side note: I had a horrible time getting the label sticker off of the front. I never understand why companies do that. I almost returned them, but I just thought of a solution to be able to keep them and not hate the way they look after trying to scrape off the label with my fingernail. 
Now, I'm happy. I just created a label of my own to cover the exact spot where the sticker wouldn't come off. Inside are all of the materials for each unit that didn't come from NYS or my school district. 

I'm already preparing a list for the next school break. Looking forward to even more organizing! It's so great to show up at school and have everything in its place. Now on to my house...


Friday, December 26, 2014

Holiday Loves

It's the day after Christmas and I'm having a hard time parting with the holidays.  I had such a wonderful time with family and friends. Like past years, there was some stress surrounding this holiday seasons.  But, as I grow older, I'm beginning to appreciate the little things (or the most important things).  Gifts are a part of the holiday and there is no changing that now...at least in my house. But, even my teenage children are starting to realize that family and friends make the holidays!

Gifts can become overwhelming...and break the bank at times!  Although, I did have some wonderful gifts (given and received) that didn't cost a lot, but certainly meant a lot.  This post is about those gifts...thank you to Pinterest and some other sources for the inspiration! 

First, I am the PTA president at my intermediate school.  We PTA officers were trying to think of a heartfelt gift to give each member of the faculty. We wanted to show our appreciation of all that they do each and every day. Someone suggested we reimburse them for a few of the "out of pocket" expenses, such as pencils, books, and other necessary supplies. That idea was fine by me, but how to do it in a holiday-themed manner that isn't impersonal, like writing a check.  Yuck!  

I quickly went to my go-to inspiration spot...PINTEREST! :)  My love of Pinterest is immeasurable.  

What came about was an idea that would take some time out of my busy schedule, but was well worth it. Let's give the teachers some cash as reimbursement that they can spend any way they see fit. The cash must be displayed in a way that says "Happy Holidays" and "We appreciate you".  This card displayed with a folded money tree "fit the bill".


The tree theme was a big hit and the classroom cash was much appreciated.  

I also made some holiday pennants for people as gifts. I wish I remembered to make one for myself. Sigh...


Lastly, one of my favorite gifts from my husband was an Alex & Ani bracelet. At about $30, these bracelets are fantastically affordable. My team is doing well this year!  Love this bracelet! 

Well, it's December 26th and I couldn't be happier...now I get to organize!  Yay!


Friday, October 24, 2014

Quicky Sticky

The kids are loving the "Quicky Sticky"! 

I love my Exit Slip bulletin board, but the procedure is quite time consuming. I have to pass out papers, students have to read the questions, they have to answer the questions, and finally they have to get up and put the paper in the appropriate folder. The procedure can take up to 15 minutes...time that I just don't have.

So...in comes the Quicky Sticky.  Students are armed with sticky notes ready to respond and stick...it's that easy!

I post a question on the smart board that reviews the daily lesson or skill...

The students write the answer on a sticky note...


They stick it to the space in the chart with their corresponding classroom number...


I use a clipboard with a class grid to assess the results. Any students who answered incorrectly are brought back for a follow up question and a possible intervention.

It's that easy!  

When I say it's time for a Quicky Sticky the students all cheer. This is a keeper!

Cheers!

Friday, October 10, 2014

Teacher Stand

I'm not much for a podium in the front of an elementary classroom, but I needed something...
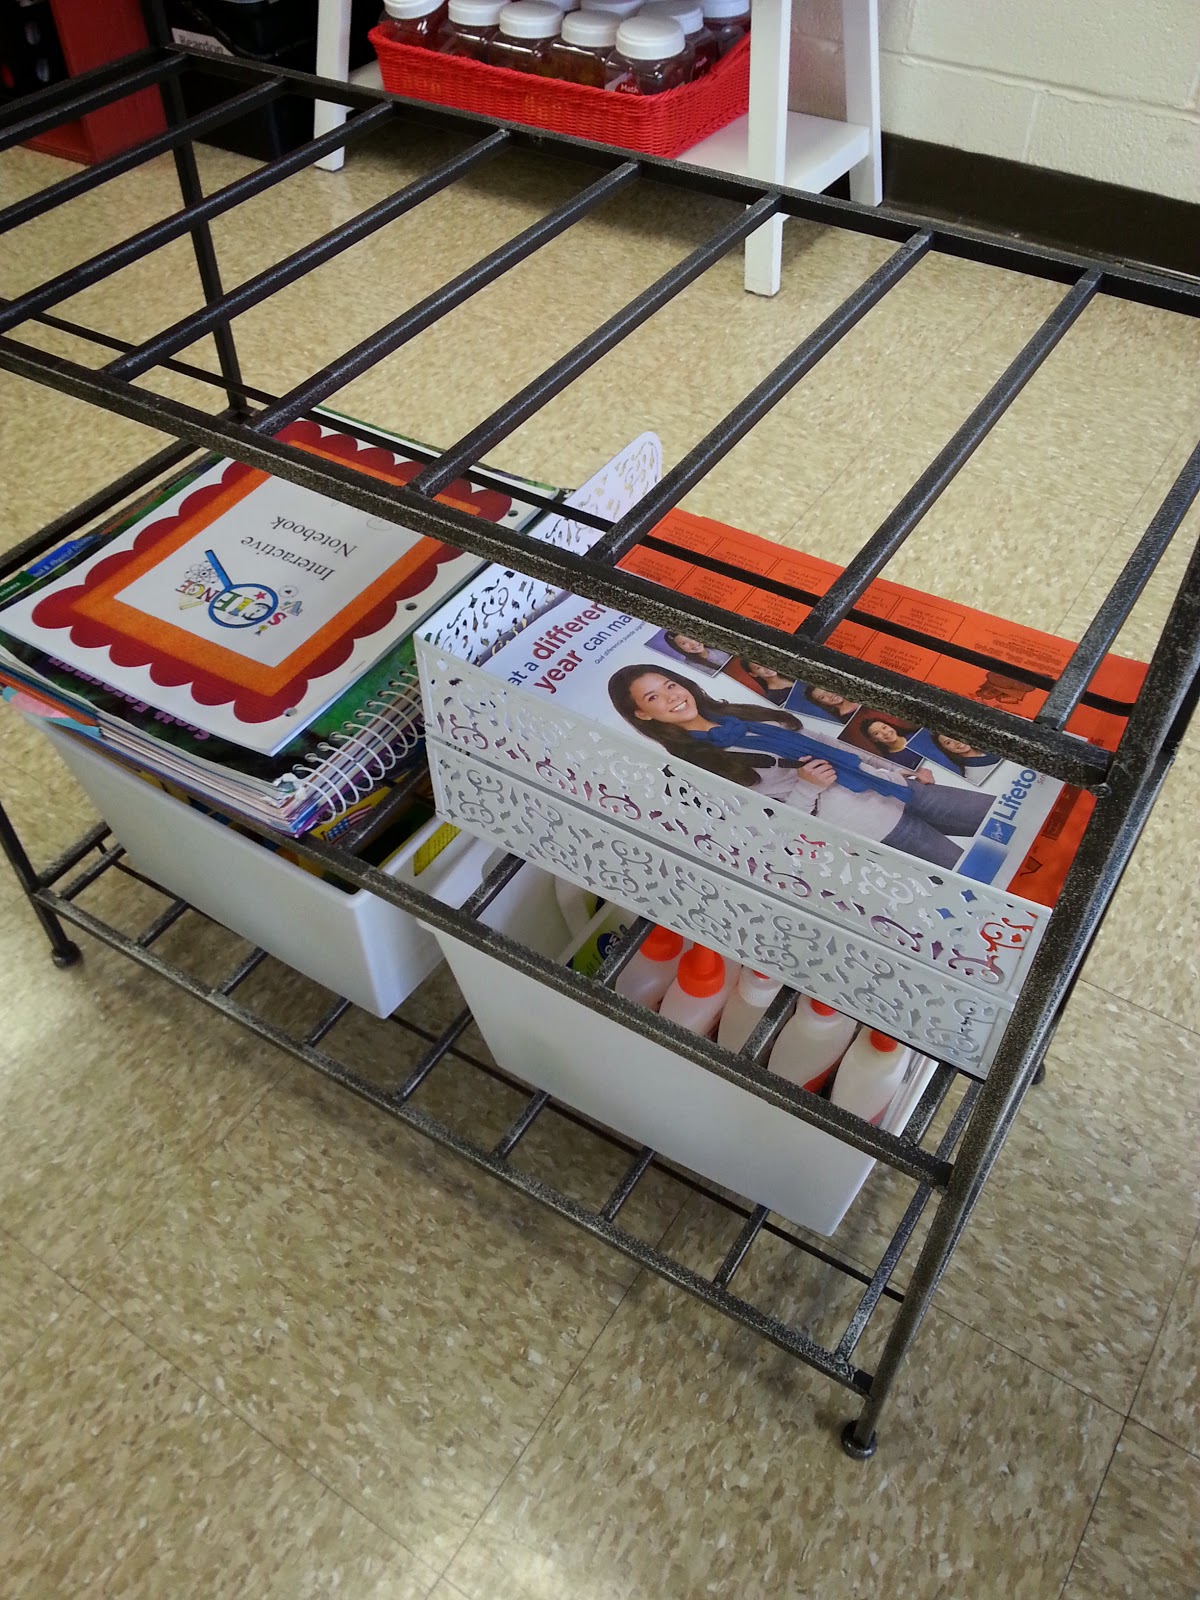
I wanted a stand with shelves to house some everyday lesson materials and a place to rest a textbook.  I was on a hunt for the perfect classroom teacher stand!  It was not an easy task. I just couldn't find exactly what I was looking for.  There were wooden shelving units that would fit the bill, but they were quite pricey. 
Finally, I found something that would work...with some slight adjustments.
It is a wire, wine rack from Christmas Tree Shop. The top is a thin sheet of metal. The price was right at $29.

I knew I couldn't leave it like this...so on with the accessories.

First, I had to cover the metal top with something a little decorative. The whole unit is quite industrial looking. I found a short table runner at a local craft store. It had colors that complimented my current room decor.

Next, I thought I should have some place to keep pencils, tape, paperclips, etc. A Dollar Store basket would do the trick. Keeping it bare was not an option. A ribbon weaved through the holes would do just fine. 

Now, there was the issue of the shelves. Although I liked the idea of wire shelving (less dust), it was going to be tough to balance papers and classroom supplies. The Dollar Store came through again with some large, sturdy baskets for glue bottles, colored pencils, and markers. 

It was time to figure out the books and papers situation. A text book would be heavy and large enough to lay on the wires. But, there was a need to keep clerical papers on the stand. When students are packing up for the day and writing in their agendas, there is often a letter going home from the office. Housing those papers right up front would work out well. I happened to have 2 white trays from home that were no longer in use. They fit perfectly in the space. The second wire shelf included a text book and "office papers" in the white, metal trays. 


Lastly, I needed to keep my daily papers front and center for instructional purposes. After a broad search on Amazon, I found some stacking letter trays that didn't break the bank at $14.99. 

The trays came with good ratings from previous buyers on Amazon, but they were quite ugly...black plastic.  UGH! 
So, back to the craft store to explore some ideas to spruce them up. I was thinking of spray painting them, but then they are just red plastic, or white plastic. Basically, no a big change. 
I found some striped burlap and a burlap bow for which I had to find a purpose. 

The glue gun came out and away went the ugly plastic trays! 


This is the front view of the teacher stand. The burlap matched great and the flower gives it a decorative touch. Only I can see the back of the plastic stacking trays. The trays are labeled to keep papers in their correct home...always easy to find. 

Staying organized is the key to...well, everything! But, especially teaching. I can't stand taking time to look for things. Everything should be at my fingertips...
It's always a work in progress.


Cheers!


Sunday, August 3, 2014

Math Jars

A math jar is a classroom tool used to practice skills and concepts. 

The math jar has "hands on" items pre-filled for exploration.  The items in the jar are designed to reinforce concepts introduced in a lesson. There are questions in the jar that students need to answer, but this format is much more engaging than simple pencil and paper.

I found the plastic containers with lids at the Dollar Tree. Since I'm planning on Math Jars being a partner activity, I only needed to purchase 12.  Then, I created labels on the color printer. A little Washi Tape around the center, and "voila"...all set to go.  

The students dump the jar and sort out the materials. The materials should connect to the daily or weekly skills. This activity can be used for review as well...more about that later. Then, the partners discuss how they are going to set up the manipulatives. They can ask questions if they are stuck, but they should use visual cues located on anchor charts, etc. before just blurting out, "I don't get it." ~the most dreadful words...

I usually circulate with a clipboard to take anecdotal notes during partner and group activities. I want to take note of who is actively participating and who is taking a back seat. I also write down formative assessment data.

While I'm circulating (some other adults in the room may be circulating or gathering a small group if needed), the students should be pulling the question strips out of the jar. Each student has several copies of the "Math Jar" activity mat in his/her binder. Then, the partners cooperatively talk through the process of the problem strip. When they have collectively decided on an answer, each student must write on his/her own activity mat.

5.NBT.1, 5.NBT.2
Each student draws a picture of what they did with the materials. Next, they each copy down the original problem and fill in the answer that they got using the manipulatives. Last, they work together to design a few sentences explaining what they did. They are encouraged to use math vocabulary (again...look around the room!), but the explanation should be written in their own words.

Ideally, I would like to go over each problem strip together in class, but time doesn't always allow for that. So, there will be times when I collect the activity mats and assess the progress. The activity mat goes home with students each day, complete and correct, to assist with homework.

Math Jars as a review activity is extremely beneficial. As we get rolling through the year with this, I will put several different kinds of manipulatives in the jar. The students have to make a decision on which items to use to solve the problems. Often, there is more than one way to get to the answer. I'm definitely going to use this activity just prior to Common Core State Tests!

Cheers!